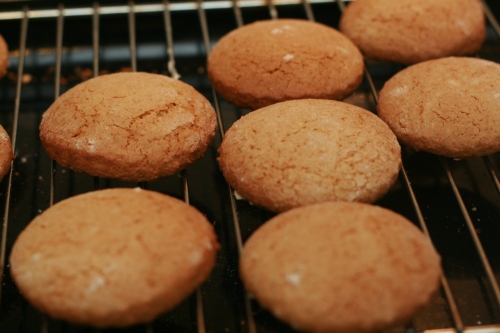
Beskuit – South African rusks…

Frank loves South African food, a trait for which I am very grateful. Or shall I say: for which he is very grateful. I’m not sure what I would do if he didn’t like it! When we first started dating I bought him some biltong, which is similar to jerky, and he loved it. (I also gave some to a British colleague who said “what is this disgusting stuff?” to which I replied “if any other South Africans see you pulling that face or hear what you just said you’ll be getting a beating. Just so you know.”)

One of the most traditional South African foods is the humble rusk. Historically, rusks evolved, along with biltong, during the latter country’s early pioneering days as a way to preserve bread in the dry climate. It was also extensively used during times of war or when travelling long distances.

In the UK and Australia they are fed to babies, but our rusks are crunchy and delicious and designed to be dunked into a piping-hot cup of tea or coffee. (But not for too long, you don’t want mush on the bottom of your mug) They aren’t too sweet, and everyone who tried them loves them. Especially Frank! When I made the first batch of these babies Frank was sneaking them out the oven and munching them before they were dried.

I’m lucky enough to work with a South African guy whose mother has passed down the family rusk recipe to his beautiful wife. She, in turn, passed it to me as my family doesn’t have a rusk recipe that I know of. And now I pass it on to you! If you have any South African friends, making these will bring back their memories of home. And if you are South African, these are much better than Ouma rusks!

Beskuit – recipe from Estelle Meyer

1 kg self raising flour
4 tsp baking powder
1 tsp salt
4 cups of bran
1/2 cup coconut
1 cup sunflower seeds
1/2 cup sultanas
500gms butter, cut into cubes
500ml cultured buttermilk
3 eggs
2 cups sugar

Pre-heat the oven to 180C/160C fan-forced.
Combine all the dry ingredients in a large bowl and rub in the butter. (If you’re in a hurry, you can melt it first).

Mix together the eggs and the buttermilk and add to the dry mixture, mixing thoroughly with your hands.

Put mixture into a bread/loaf pan, and bake for an hour, until golden.

Cool in pan and reduce oven temperature to 100C, then cut mix in slices like bread. Cut those slices into thin strips and place on baking paper directly on the oven racks and leave to dry for 3 hours.

Can be stored for up to two weeks in an airtight container, but I doubt they’ll last that long…

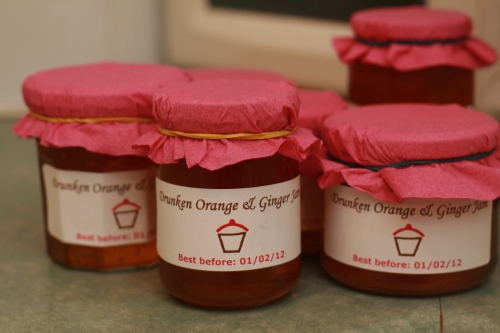
Drunken Orange & Ginger Jam

I initially got into cooking when I moved to the UK. Because of this, I can cook a vast repertoire of heart-warming stodgy winter food, but am pretty useless at light, summer food. So, despite me being a massive “cold frog” and hating the chill, I find myself greatly anticipating winter!

All the good things seem to happen in winter. The rugby, rugby league and AFL starts; my birthday gets closer; and I get to make thick stews and puddings to keep us warm through the chilly months. I also get to count down the days until Papa C’s lemon tree goes crazy and produces more lemons than we can pick!

I have noticed lately that the citrus fruit is becoming plentiful, but I’m not the biggest fan of marmalade as it is too bitter for my liking. So I’ve made a slightly sweeter orange jam, and jazzed it up with a bit of sherry for the cold. You can leave the sherry out, it tastes good without it. This one would also be good on fresh scones!
Drunken orange jam – adapted from the BBC Good Food website
1 kg oranges, well scrubbed and halved
1 unwaxed lemon
1.5 kg granulated sugar
30g stem ginger
2 l water
1/3 cup sherry

the oranges having a bath...

Grate the rind and squeeze the juice of the oranges and lemon, and place in a large saucepan with 2 l water and ginger.

Bring the liquid to the boil, then simmer for about 1 hr, or until the peel is soft and translucent and the liquid has reduced by one third. Turn off the heat and lift the ginger out.
While you wait, get your jars ready. Wash 8 x 450g/1lb jars (or the equivalent volume larger or smaller jars) in hot, soapy water, then leave in a low oven to dry completely. Keep them warm. Alternatively, if you’ve got a dishwasher you can run the jars and lids though a hot cycle, then let them dry. Put a saucer in the freezer at this point, too.
Add sugar and pectin to the pot, along with the sherry. Stir every so often over a very gentle heat until the sugar has completely dissolved. Don’t boil before all the sugar has melted.

Slowly bring the pan to the boil. After 10 minutes boiling, spoon a small blob of marmalade onto the cold saucer. Leave for a minute, and then push the marmalade with your finger. If it wrinkles, it’s ready. If not, boil for 10 minutes more then try again. If yours seems to be taking a while don’t worry, it can take anything from 10 minutes to 45 minutes for marmalade to reach setting point, depending on your oranges. Skim off any scum that comes to the surface in the meantime.

Once you’ve reached setting point, ladle the marmalade into the warm jars and seal. The marmalade will keep for up to 1 year in a cool, dark place, and for up to a month in the fridge once opened.

April Daring Baker’s challenge – Maple mousse!

When I think of maple syrup I think of Canada in the autumn, with beautiful red leaves on the trees and a slight nip in the air. So this challenge is perfect, as Sydney is feeling the autumn chill and needs the perfect sugary pick-me-up!

The April 2011 Daring Bakers’ challenge was hosted by Evelyne of the blog Cheap Ethnic Eatz. Evelyne chose to challenge everyone to make a maple mousse in an edible container. Prizes are being awarded to the most creative edible container and filling, so vote on your favourite from April 27th to May 27th at http://thedaringkitchen.com!

Our lovely host Evelyne wanted to share a bit of her maple-syrupy home with us for this challenge. Since Lisa and Ivonne of DB fame challenged her to include an edible container she decided to make a Maple Mousse served in a baked Bacon Cup, topped with a meringue. But luckily she offered alternatives for the bacon-fearers, as I don’t have a fear of bacon but a fear of bacon filled with mousse!

Maple mousse is a wonderful idea, and I was grateful that the mandatory items of the challenge were that we must make a) one of the 2 maple mousse recipes listed, and b) an edible container in which to place the mousse for presentation. Evelyne also allowed us to substitute maple syrup if we couldn’t find any, which is exactly what I had to do.

Since there is a competition for the best edible container, I thought I’d veer from the provided recipes and try a lovely coconut base that I have used before. Sadly when it came to making the container it flopped. So instead I made a little  spoon out of shortcrust pastry, the recipe of which I got from my go-to recipe site. Hopefully the wonderful ladies will forgive me for this and still count me as having completed the challenge!

The maple mousse recipe was easy to follow, and I substituted the maple syrup for 50% red gum honey and 50% golden syrup. The honey flavour was light and very rich. The challenge was fun, and the recipes sound, so thanks Evelyn for setting us such a great challenge!

Recipe Sources:
– Maple mousse is adapted from Jaime Oliver is not my boyfriend
– Pastry decorations are from Not Quite Nigella’s shortcrust recipe

Maple Mousse:

1 cup (240 ml/ 8 fluid oz.) pure maple syrup (not maple-flavoured syrup)
4 large egg yolks
1 package (7g/1 tbsp.) unflavoured gelatine
1 1/2 cups (360 ml. g/12 fluid oz) whipping cream (35% fat content)

Bring maple syrup to a boil then remove from heat.
In a large bowl, whisk egg yolks and pour a little bit of the maple syrup in while whisking (this is to temper your egg yolks so they don’t curdle).

Add warmed egg yolks to hot maple syrup until well mixed.
Measure 1/4 cup of whipping cream in a bowl and sprinkle it with the gelatine. Let it rest for 5 minutes. Place the bowl in a microwave for 45 seconds (microwave for 10 seconds at a time and check it in between) or place the bowl in a pan of barely simmering water, stir to ensure the gelatine has completely dissolved.

Whisk the gelatine/whipping cream mixture into the maple syrup mixture and set aside.
Whisk occasionally for approximately an hour or until the mixture has the consistency of an unbeaten raw egg white.
Whip the remaining cream. Stir 1/4 of the whipped cream into the maple syrup mixture. Fold in the remaining cream and refrigerate for at least an hour.

Remove from the fridge and divide equally among your containers, top with decorations and serve.

Hot Cross Buns! Happy Easter!

I have a huge fear of worms, and worm-like creatures. It is my one irrational fear, and they are the only creatures that’ll have me screaming like a 10-year-old girl at a Justin Bieber concert.  I’m not the biggest fan of spiders and cockroaches, but I can easily just walk away and ask Frank to remove them. But worms, worms make me shudder and want to scratch my back and gag all at the same time.

The Pig Palace always gets an invasion of crawlies in April. I’m not sure if it’s the sudden drop in temperature or the increase in rain, but they move in with us in droves. Lucky for me the only worm-like creatures to make it into the perimeter so far were the five slugs sitting on top of the bin outside. (Which Frank was ordered in a hysterical voice to remove before I moved.)

The most irritating crawlies at the moment are the cockroaches. We’ve had our share of the ants with giant noses, but they only go for almond meal and are easy to get rid of. The cockroaches however scurry all over the place when you least expect it, and they don’t even bother to tread softly. Last night I opened the kitchen cupboard to find a jet-black roach staring at me. He then proceeded to waltz into the dark recesses and scratch around for food. I could actually hear him trying to decide between the peanuts and the risotto rice. Despite my frantic waiving of my flop-flop, he lived to feed another day. I’m almost certain that one of these days I’m going to come home and find him with my dressing gown and slippers on, drinking a glass of our best red. Or in my bed with his arm around me.

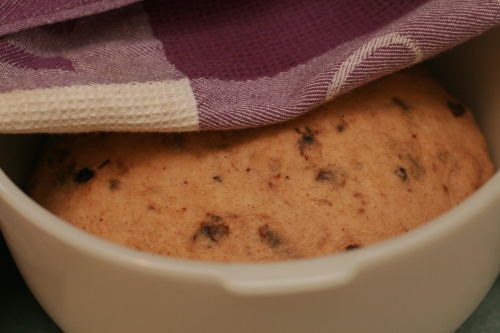
So, to use up all the good snacks from this roach’s selection and to celebrate Easter, I have made a batch of hot cross buns. They are delicious straight out of the oven, and also great toasted the next day. And they are roach-free!

HAPPY EASTER EVERYONE!

Hot Cross Buns – recipe from the BBC Good Food website

FOR THE DOUGH
450g strong white flour , plus extra for dusting
2 x 7g sachets easy-blend yeast
caster sugar
150ml warm milk
1 egg , beaten
50g unsalted butter , melted, plus extra for greasing
oil , for greasing

THE SPICES AND DRIED FRUIT
1 tsp ground cinnamon
½ tsp mixed spice
¼ tsp grated nutmeg
100g currants

TO DECORATE
4 tbsp plain flour
2 tbsp granulated sugar

Put the flour, yeast, caster sugar and 1 tsp salt into a large mixing bowl with the spices and dried fruit and mix well.

Make a well in the centre and pour in the warm milk, 50ml warm water, the beaten egg and the melted butter.

Mix everything together to form a dough – start with a wooden spoon and finish with your hands. If the dough is too dry, add a little more warm water; if it’s too wet, add more flour.

Knead in the bowl or on a floured surface until the dough becomes smooth and springy. Transfer to a clean, lightly greased bowl and cover loosely with a clean, damp tea towel. Leave in a warm place to rise until roughly doubled in size – this will take about 1 hr depending on how warm the room is.

Tip the risen dough onto a lightly floured surface. Knead for a few secs, then divide into 12 even portions – I roll my dough into a long sausage shape, then quarter and divide each quarter into 3 pieces.

Shape each portion into a smooth round and place on a baking sheet greased with butter, leaving some room between each bun for it to rise.

Use a small, sharp knife to score a cross on the top of each bun, then cover with the damp tea towel again and leave in a warm place to prove for 20 mins until almost doubled in size again. Heat oven to 200C/180C fan/gas 6.

When the buns are ready to bake, mix the plain flour with just enough water to give you a thick paste. Spoon into a piping bag (or into a plastic food bag and snip the corner off) and pipe a white cross into the crosses you cut earlier.

Bake for 12-15 mins until the buns are golden and sound hollow when tapped on the bottom. While still warm, melt the granulated sugar with 1 tbsp water in a small pan, then brush over the buns.

Simple “French” Roast Beef

When Frank and I decide to cook roast beef two things happen. 1. We immediately forget how to cook roast beef. It’s as if we have never cooked it before, and 2. We become French.

I love cooking roasts on the weekend, and Saturday was a great day for trying another roast beef. The first time I made it the oven turned off on its own (??) and it was still moo-ing when it came out. The second time I made it the roast was tasty, but resembled boot-leather.  So when we put the beef in the trolley this time I hoped it would be third time lucky!

When it came time to make the roast, Frank gallantly volunteered to take charge of it. Frank isn’t a big fan of cooking, and despite making one of the best omlettes I have ever eaten, he doesn’t like forcing people to eat the food he’s cooked. But when he does get into the kitchen you’re guaranteed to have the giggles!
This is when the French started. The beef was only referred to as le boef, and as he was frying it he was yelling “wee wee” and making weird noises in a french accent. Le boef was treated very well, and got sweet nothings whispered to it while in the pan, which must have worked as the beef turned out really well! We used the time parameters below, which worked for us. Frank tried to use his new meat thermometer, but it was registering as still cold on this inside when in fact it was perfectly cooked, so perhaps we won’t go with the thermometer next time.

This recipe makes a delicious roast beef that isn’t dry at all, so it wouldn’t need to be marinated beforehand. But if you like different flavours, soaking it in a little red wine and garlic wouldn’t go amiss. And don’t forget to speak to it in a French accent…

Simple roast beef – Frank’s way
Serves 4

1.25 kg topside beef
2 tbsp olive oil
2 tsp mixed herbs
2 tsp barbeque spice mix
Salt & pepper

Preheat oven to 220C. Heat a pan on the stove and sear meat on all sides to seal in juices.

Place on a roasting rack, and fill base with 1 cup water/stock.

Place beef in the oven for 15 minutes, then turn the oven down to 180C and cook for 40 minutes (for medium rare)
Allow to rest for 15 minutes, carve and serve with mustard or gravy!

If you like your beef cooked more, or less, here are the recommended times for topside:
Cook for 220C for 15 minutes and then turn down to 180C for:
– rare: 10-15 minutes per 500g beef
– medium: 15-20 minutes per 500g beef
– well done: 20-25 minutes per 500g beef

Rhubarb & Vanilla Jam

My tummy is the boss. When it says jump, I don’t even stop to ask how high, I just jump as high as I can in a desperate attempt to keep it happy. My tummy tells my mind what to think, and my hands what do to. Which is why I can never be blamed for eating anything I’m not allowed to, my tummy made me do it officer!

Avoiding sugar for so long as made me slightly nuts. My tummy has been rather angry with me and is intent on seeking revenge. The other day I was sitting on the couch and my tummy said to me “why don’t you try that delicious custard tart in the fridge, Frank won’t even notice it’s gone, and I won’t tell your Naturopath”. As my tummy presented a solid argument, I thought “why not eh!” and proceeded to scoff down the only custard tart in the fridge (it was small, don’t worry).  Unfortunately Frank went into the fridge that night and asked where the custard tart went… and I was totally busted! I believe his words were “has it gotten so bad that you are eating in secret?”, but of course it wasn’t me, it was my tummy that did it!

Because of my sugar addiction, my tummy has been dreaming up all sorts of sugary deliciousness for me to make. And as there has been a mass of rhubarb in our local store lately, I decided to try my hand at rhubarb jam. This recipe is really simple to follow, and the jam is delicious. As soon as I finish the diet I’ll be making fresh scones to have all the jam with.  And tummy says “yes please!”
Rhubarb & vanilla jam – recipe from the BBC Good Food website

1 kg rhubarb, weighed after trimming, cut into 3cm chunks
1 kg jam sugar (or 1 kg sugar plus 1 x 8g sachet pectin)
2 vanilla pods , halved lengthways
juice 1 lemon

Put a small plate in the freezer. Put the rhubarb into a preserving pan or your largest saucepan with the sugar and halved vanilla pods. Heat gently, stirring, until all the sugar has dissolved, then squeeze in the lemon juice and increase the heat.

Boil for about 10 mins, skimming off the scum as you go (the fruit should be soft).

Test for setting point by spooning a little onto your chilled plate. After 1-2 mins, push your finger through the jam – if the surface wrinkles it is ready, if not, keep cooking for 2-min intervals, testing in between. (Or if you have a sugar thermometer it should reach 105C)

Once the jam is ready, let it cool for about 15 mins before ladling into warm sterilized jars and sealing. Will keep for 6 months in a cool, dark place.

Hertzog cookies

Please don’t get me wrong, I love Australia. But when I’m walking down the street and I hear a South African accent, I realise just how much I miss home. I’m not sure if I miss the lifestyle I had there; but I miss my friends and family, and that feeling of “familiar”. We moved around a bit as a kid, so in total I have grown up in three towns and lived in three countries, and yesterday I had a minor crisis that I might end up forgetting my roots.

But really, the South African in me is as strong as ever! I speak Afrikaans to Frank quite often (and he has the grace to nod and give me what he thinks is the correct answer, even though he doesn’t speak the language. Although I think he nods and gives what he thinks is the answer whether I’m speaking Afrikaans or English…) and I regularly lapse into South African expressions, which tends to cause a bit of confusion. For example:
– Loll to Frank: “wow, he’s not the brightest khoki in the box, is he?”
– Frank to Loll: “yep, he definitely isn’t the brightest cookie in the box.”
At which point I was on the floor laughing at the fact that Frank thought I was just saying “cookie” in an Afrikaans accent! (For those who aren’t South African, a khoki is a felt-tipped pen.)

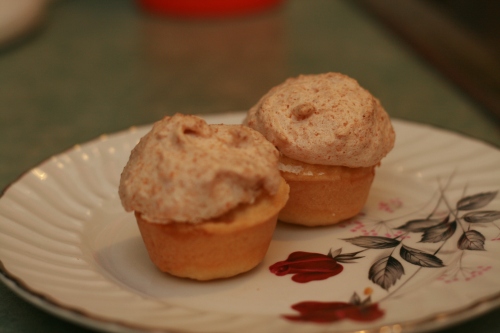
So, to celebrate our rich South African culture (and to make Frank a little chubby), I decided to make something I haven’t eaten in years: Hertzog cookies. These jam and coconut tartlets are known as Hertzog koekies in South Africa, and are part of every South African housewife’s traditional recipe collection. They were named after General J.B.M. Hertzog, prime minister of the South African Union in 1924.
These cookies are fairly easy to make, and taste amazing. I’m going to make another batch as soon as I can!

Hertzog cookies – recipe from Margaret Ramsbottom’s “Cooking is fun”

2 cups all-purpose flour
2 tsp baking powder
pinch salt
1/4 cup castor sugar
125g margarine/butter, softened
3 large eggs, separated
4 tbsp water
½ cup apricot jam
1 1/4 cup white sugar
2 cups desiccated coconut

Preheat oven to 180C/160C fan-forced
Sift Flour, baking powder and salt together. Add castor sugar and rub in butter.
Beat egg yolks and water together and add to dry ingredients, mixing to a soft dough.

Roll dough out thinly and press out circles. Line a greased muffin tin with circles. (I used a mini-muffin tin, but it’s best to use a mince-pie/patty pan tin)

Spoon a teaspoonful of apricot jam into middle of each circle.

Beat egg whites until soft peak stage. Add the white sugar slowly, while still beating. Fold in coconut and spoon the egg mixture onto the preserves.

Bake for 20 – 25 minutes
Turn carefully onto a wire rack to cool.

Orange & coconut shortbread cookies

My brain was gifted to me in marble-form. For most of my childhood I carried the full collection of marbles, taking different ones out to suit the situation. (And, at times, they would get stuck in the bag and refuse to come out. Usually when my brother was trying to convince me I was an alien.)

However, I strongly suspect that when I reached adulthood my marble-container became perforated, and one or two began to fall out. There has been a substantial amount of rattling in there, but when I come to use particular ones they are nowhere to be found.
I find myself forgetting the simple things, like how I got home from work (sober, I promise). Or, if I did indeed send that letter to the client like I said I would. Or the time I broke a flat-mate’s expensive glass and convinced him that he did it when he was drunk. Or what I gave Frank last year for his birthday.

At first it was frustrating to realise that I’ve lost a couple of marbles, but I am comforted to know it’s a family thing. (;), only kidding family!) One day I am fully expecting to lift up the couch cushions and find those little marbles waiting for me, or perhaps Frank will slip on a couple while getting out of bed…

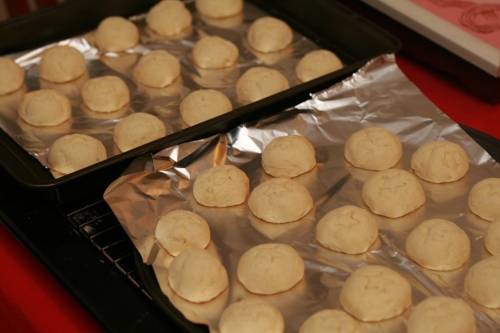
One day when I was having a quick search for my marbles, I remembered Frank had requested I make him some biscuits. So I had a quick look in my recipe books, and found this easy and delicious recipe. The dough feels beautifully silky when you roll them, and they look like slightly flat marbles when they come out! Be careful though, they are incredibly morish…

Coconut & orange shortbread biscuits – recipe adapted from AWW’s “Mix” book

250g butter, softened
Scant cup icing sugar
1 ½ cups plain flour
2 tbsp rice flour
2 tbsp corn flour
½ cup almond meal
½ cup desiccated coconut
2 tbsp orange juice
½ tsp orange blossom water (optional)

Preheat oven to 150C/130C fan-forced and line two baking trays with baking paper
Beat butter and sugar in a large bowl until pale and creamy.

Add in the rest of the ingredients and mix until dough is formed.

Shape level tablespoons of mixture into balls and place 3cm apart on the baking tray. Flatten with a fork.

Bake for 25 mins or until firm. Leave to stand on the tray for 5 mins, and then place on a wire rack to cool.
Cover with additional sifted icing sugar if you choose.

Mountanous walks & Turkey stir-fry!

On weekends I enjoy practicing impressions of my favourite vegetable on the couch. This, in turn, means I am not much of a walker. (Seriously, do you see any potatoes walking the streets?) With my new diet, I am more eager to get a little breeze in my hair, but before January Frank needed a giant-potato-sized crowbar to get me off the couch.

The fact that I am not much of a walker was never kept a secret from Frank. The giant sighs when a walk was suggested definitely indicated that. Despite this, he insisted on walking when we went on holidays – we walked the entire length of Istanbul, we walked Stockholm (in snow), and we walked Copenhagen (in sub-zero winds). But as Australia is such a big place, when we came here for our first visit we drove almost everywhere. *yay!*

One day on this holiday, Frank asked if I was interested in checking out the beach and “going for a little walk”. As we were in the sunshine, and I was mildly distracted, I agreed to it. Naively I asked if I need to bring my trainers, or if thongs/flip-flip flops will do. And his answer was “ah, maybe bring your trainers just in case”.

And when we arrived at the little walk the realisation hit me: Frank is great at keeping a straight face!!  I stared up at a mountain and gasped, we were at Tomaree Head.  With a 161 metre high summit, it wasn’t what I classified as a “little walk”! Needless to say, we got to the summit with the maximum amount of whining, sulking, and reluctance; and I never let him live it down. The views from the top are amazing though, so it made the whole effort worthwhile.

I liken my diet to that fateful trip to Tomaree Head. It is a long, hard slog; and I am whining and sulking all the way, (cue mini violin of pity) but in the end the whole effort will be worthwhile. So, with the maximum amount of whining and sulking, I have adapted my cooking to exclude all the allergens. As I am not allowed beef mince, I made the below recipe with turkey. It tastes surprisingly good despite being healthy, so if you’re looking for something that is full of flavour but not many calories this is the dish to try…

Spicy turkey mince – a Lollcakes original
Serves 4 normal appetites, or 3 big ones

225g rice noodles
1 teaspoon sesame oil
2 garlic cloves, finely chopped
1 teaspoon freshly grated ginger
1 red chilli
500g turkey Mince
1 red onion, thinly sliced
1/2 cup fresh chicken stock
2 1/2 tablespoons soy sauce (I used organic tamari as it is wheat-free)
2 teaspoons cornflour
1 tablespoon water
1 cup grated courgette
1 cup grated carrot
Handful coriander, chopped finely
Shredded red onion, for garnish

Cook noodles according to packet instructions
Heat oil in wok over a medium heat; add onion, garlic, chilli and ginger and lightly sauté for 1 minute.

Add turkey mince and increase heat to high. Cook turkey for 8 minutes till brown and toss frequently.
Reduce heat to medium and add to the turkey the carrots, stock and soy sauce.

Stir to combine and thicken with blended cornflour and water. Allow liquid to gently simmer and thicken slightly. Stir through the courgette and coriander.
To serve, divide hot noodles into serving bowls and top with cooked turkey mince and onion.

Gingerbread biscuits

My nickname isn’t Piglet for nothing. Despite the fact that my mom thinks I look exactly like him (all I need is the pointy ears apparently), I think my appetite had more influence on my name. In London, the department I worked in was known for the amount of treats in the communal area.  There was always chocolate on the shelf, and people used to hang around the door at tea time to see what we had that day.

My line manager at the time, Bockers, (who I am proud to say is a very dear friend) used to bring in treats that his wonderful wife made. Her speciality was gingerbread biscuits. Her gingerbread biscuits were so delicious that Bockers and I almost came to blows many times in order to get the last biscuit.  Her biscuits were literally like a ray of sunshine, one of the few reasons I was flying out of my seat in excitement.
It got so bad in the office that Bockers would sneak the biscuits into the communal area, I would spy them out the corner of my eye, and we would run up and snatch them as fast as we could. We ended up counting how many the other person had and arguing that the last one was ours.

Bockers is one of those people who would be classified as an anchor in people’s lives. He is the eye in his friends’ internal storms, and he is the one that turns your frown upside down. He and his wife brought me a lot of joy during my time over there, and I thought I’d attempt to do the same to my team over here. The recipe is easy to follow, and (if you like ginger) the results are delicious. I hope they bring the people in your life as much joy!

Gingerbread biscuits – recipe courtesey of Catherine Richmond, thanks Catherine!

350g Plain Flour
Up to 1 teaspoon of ground ginger
1 teaspoon of bicarbonate of soda
100g of butter/margarine
175g of soft light brown sugar
1 egg
4 tablespoons of golden syrup

Pre-heat oven to 190C
Put the flour, ginger and soda into a bowl and rub in the butter.

Add the sugar and stir in the syrup and egg to make a firm dough. (don’t be afraid to get your hands in at this point)

Roll out dough to about 5mm thick and cut out your shapes.

Bake for 10-15 minutes (make sure you leave plenty of space between each shape on the baking tray because they grow!)


My nickname isn’t Piglet for nothing. Despite the fact that my mom thinks I look exactly like him (all I need is the pointy ears apparently), I think my appetite had more influence on my name. In London, the department I worked in was known for the amount of treats in the communal area.  There was always chocolate on the shelf, and people used to hang around the door at tea time to see what we had that day.


My line manager at the time, Bockers, (who I am proud to say is a very dear friend) used to bring in treats that his wonderful wife made. Her speciality was gingerbread biscuits. Her gingerbread biscuits were so delicious that Bockers and I almost came to blows many times in order to get the last biscuit.  Her biscuits were literally like a ray of sunshine, one of the few reasons I was flying out of my seat in excitement.

It got so bad in the office that Bockers would sneak the biscuits into the communal area, I would spy them out the corner of my eye, and we would run up and snatch them as fast as we could. We ended up counting how many the other person had and arguing that the last one was ours.


Bockers is one of those people who would be classified as an anchor in people’s lives. He is the eye in his friends’ internal storms, and he is the one that turns your frown upside down. He and his wife brought me a lot of joy during my time over there, and I thought I’d attempt to do the same to my team over here. The recipe is easy to follow, and (if you like ginger) the results are delicious. I hope they bring the people in your life as much joy!


Gingerbread biscuits – recipe courtesey of Catherine Richmond, thanks Catherine!


350g Plain Flour

Up to 1 teaspoon of ground ginger

1 teaspoon of bicarbonate of soda

100g of butter/margarine

175g of soft light brown sugar

1 egg

4 tablespoons of golden syrup


Pre-heat oven to 190 degrees centigrade (gas mark 5)

Put the flour, ginger and soda into a bowl and rub in the butter.  Add the sugar and stir in the syrup and egg to make a firm dough.

Roll out dough to about 5mm thick and cut out your shapes.


Bake for 10-15 minutes    (make sure you leave plenty of space between each shape on the baking tray because they grow!)


Enter your email address to subscribe to this blog and receive notifications of new posts by email.

Join 14 other subscribers

I’m a proud member of:

lollcakes Archive

All recipes are on Petitchef